Tuesday, August 13, 2013

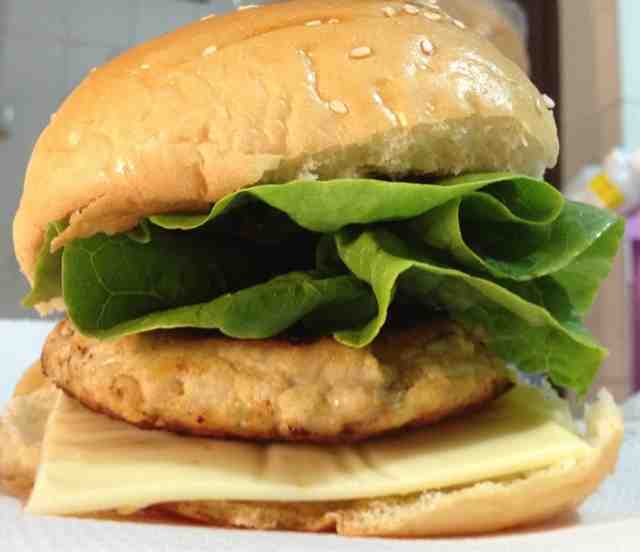
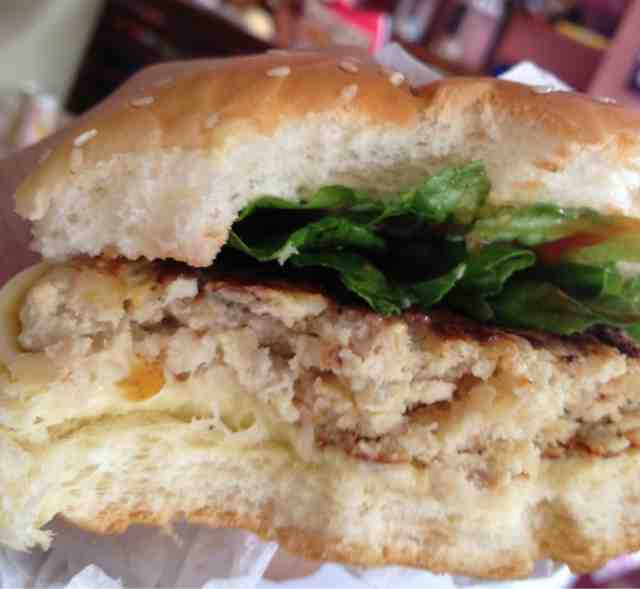
Homemade Meat and Lentils Burger


Rice and noodles are the two typical staple products that I would make sure I stock them up most of the times like all other Asian households. Meals served in my household are mainly based on these two staples cooked or served in various ways. I want a change!! Yesterday I decided to make burgers for the kids and myself for lunch and we had it to our satisfactions. The fact that my boy, who is picky about food, finished almost the whole burger, it showed that it was yummy. So did my daughter.

I am not a health freak in terms of food but I do try to pay attention to the food I prepare for my family. This recipe was adapted from a book called 'Feed Your Child Right' that I bought many years back. The fact that it is a well-balanced recipe packed with lots of vitamins, minerals, fiber, proteins and other benefits made me feel good serving it. What's more..? It is light and delicious.

The only drawback I could say was that the patties didn't manage to bind together very well due to the smooth texture of the mashed potato and the grainy lentils. This could be easily fix with a little more cornstarch added to the mixture to bind everything together. The other change I made to the recipe was the seasoning. I made the change based on my inclination as of what I have in the pantry and what I thought would work to bring out the fragrance of the lentils without overpowering the rest of the ingredients.


Ingredients
(make 5 large patties)

200g ground lean pork
1/2 cup orange lentils cooked and cooled
1/2 medium onion, finely chopped
1 medium potato, boiled, mashed and cooled
1 medium egg
Dash of cumin
Dash of steak seasoning
Dash of garlic salt
Dash of pepper
1 tsp dried parsley
1/2 tsp cornflour dissolved in a little water

Butterhead Lettuce
Sliced Cheese

Method

1. Mixed all ingredients together except the butterhead lettuce and cheese.

2. Shape it to approximately 5-6 round patties

3. Dust it with flour and shallow fry both sides for about 2 - 3 minutes.

Note:
1. You may make a lot of patties in advance and freeze them in the freezer. To do so, cover each individual patties with plastic or cling wrap.

2. You may use chicken, mutton or lean beef.

Thursday, August 1, 2013

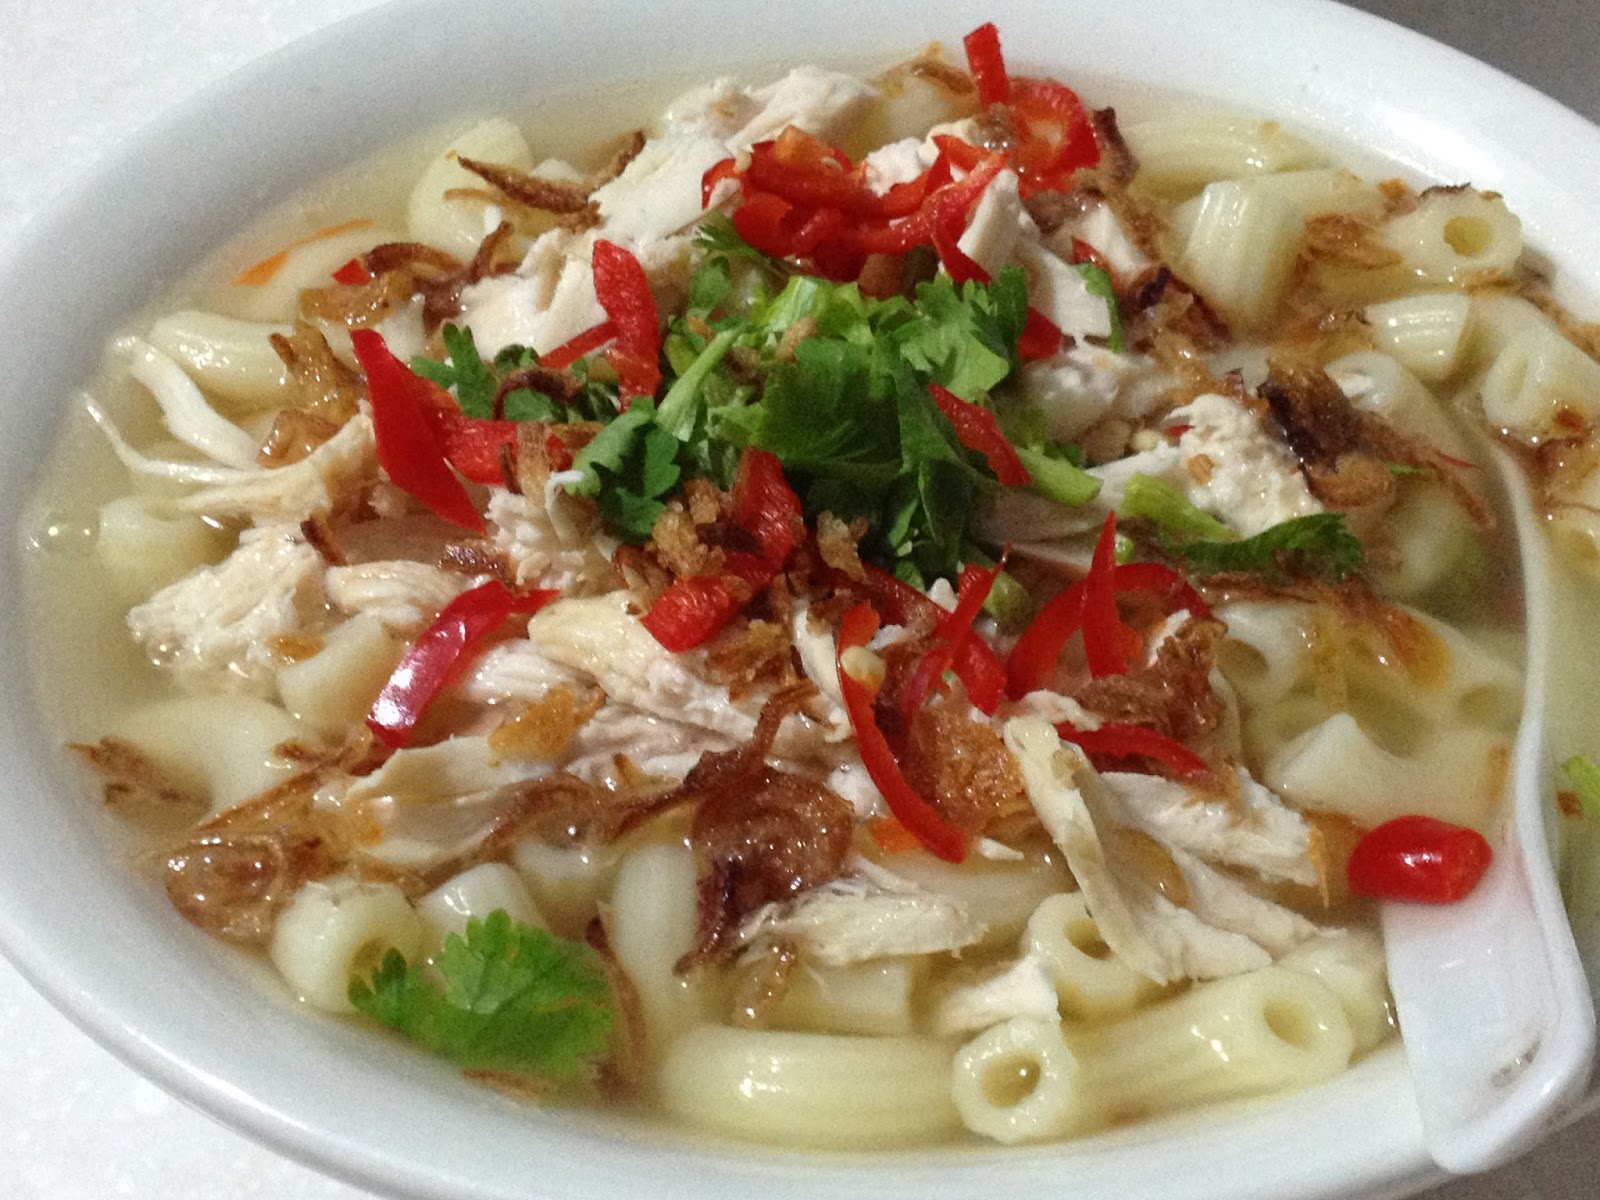
Macaroni Chicken Soup

 
If you were to google in the web on macaroni chicken soup, you probably would find ton of interesting recipes from Western to Asian styles. The images are captivating and each one looked so delicious and has its uniqueness just for this simple dish. I took a closer look at most of the images and visited some of the sites that I thought the recipes would be closed to what I was searching for. Unfortunately, I could not find one that pleased me. What am I looking for??

I think I need to share with you a little more on how this dish was served in my family when I was young that I didn't like back then and how I fell in love with it now. This dish was only prepared whenever someone fell ill in my family. So you could probably imagine how plain this dish was going to be prepared; served with simple non-oily stock like anchovies broth, pak choi and perhaps ham or sliced pork. I remembered I would never enjoy eating it no matter how tasty it was but I am still thankful for my mum's effort very much!

When I looked through the macaroni soup recipes that I could find in the websites especially those cooked in Asian styles, many called for chicken broth as the soup base and a variety of vegetables like pak choi, carrots and/or peas and some use ham, fish balls and/or sausages, shredded chicken for the meats. Some even added Chinese Angelica Root (Dang Gui). Frankly it doesn't taste bad but not an excellent one still I would say. Somehow or rather all the recipes that I stumbled on didn't hit me at all. This wasn't only because of how this dish brought back 'unpleasant' childhood memories but mainly because I tasted an absolutely delicious bowl of simple clear chicken broth macaroni in the Church I attended every Sunday later on in Singapore.

This Macaroni Chicken Soup was flavourful with tasty clear chicken broth, fragrant with a little hint of ginger, Chinese parsley, and fried onions. Simply served it with some chopped red chillies, light soy sauce and toasted bread crumbs. Omit all the 'intimidating' ingredients like vegetables or meats for health reasons or whatsoever just for this time as to preserve the original flavour of the chicken essence and I bet that you will not regret of doing so :).

You could probably cook chicken rice for lunch and use the broth to prepare a light dinner meal just for this dish like what I did. I will share with you the recipe for chicken rice in my upcoming post...

Ingredients:
1 bird of chicken (About 800g)
Salt to wash chicken
3-5 thick slices of old ginger
Water just enough to cover the chicken

1 packet of macaroni
Water to boil the macaroni
Salt

Chinese parsley (Coarsely chopped)
Red chillies (Seed removed and julienned)
Store-bought fried onions
Bread crumb (Cut white bread into small cubes and toast in the toaster or oven until crunchy)
Chicken bouillon granules
Salt to taste
Dash of pepper and light soy sauce when serve
 
Method

1. Boil water, throw in some salt and cook the macaroni until al-dente and set aside.

2. Rub the cavity and the outer part of the chicken with salt. Rinse and wash.

3. Prepare a pot of cold water. Put the cleaned chicken in the cold water and switch on the fire at very low temperature. Make sure that the water is hot but not boiling throughout. Let the chicken sit in the hot water for about an hour to an hour and a half and cook it using indirect heat.

4. Remove chicken and rinse with cold water and set aside.

5. Chop the chicken neck off debone the breast. Pound the bones in a pestle to optimise the chicken flavour while keeping the thighs for your chicken rice. If you are not cooking chicken rice together with this dish, you may debone the whole chicken and pound all the chicken bones and throw the crushed bones back to the pot of soup. Shred the chicken meat to your liking and set aside.

6. Chop off the roots of the Chinese parsley and throw them into the pot while keeping the leaves for garnishing. Brew the soup for another half an hour or so.

7. Add salt and chicken bouillon granules to taste.

8. Remove fat from the soup.

9. Put some cooked macaroni in a bowl. Using a sieve, scoop some soup into the bowl to warm up the macaroni then drain away the soup back to the main pot.

10. Using a sieve again scoop some soup to the bowl of macaroni. Serve with shredded chicken, fried onions, chopped parsley, julienned red chillies and bread crumbs (optional) with dash of pepper and light soy sauce.

 
(Despicable Me 2 was in the theatre last month and it was my kids' favourite show. I thought this picture was too cute not to be posted and shared...
I thought Minions only love bananas?! heee) 
 

Note :

1. Just to share with you a silly experience I had when I was toasting small cubes bread. Stay near to your toaster and watch it closely as it got toasted and BURNT too fast without you knowing. My kitchen almost caught fire few years back because of this.


Thursday, July 18, 2013

Soy Sauce Chicken with Liquorice Roots


This is a modified recipe from the original recipe that I posted last month on Soy Sauce Chicken. I wanted a chicken dish with vegetables that doesn't require long time of preparation and cooking. I also wanted to have a grilled chicken meat without using the toaster or oven. If you are residing in Singapore, Happy Call Pan is a no stranger term of cookware to you. I was cooking this dish with this magical pan.

I threw in lots of carrot to this dish which added the natural sweetness to it. It is tasty and best to have it together with a bowl of white rice. The flavour and taste is completely different from the Soy Sauce Chicken I posted a while ago.

Soy Sauce Chicken with Liquorice Roots

Ingredients
3 drumsticks with thighs
salt to wash chicken

10 shallots, skin peeled
10 cloves of garlic, skin peeled
1 cup of water
4 - 6 medium-sized carrots, cut into thick slices
2 pieces of 3 inches long Liquorice Roots
1 piece 0.5 cm thick ginger
6 cubes small rock sugar

To Marinate the Meat:
2 tablespoon of mushroom sauce
2 tablespoon of light soy sauce
1 tablespoon of dark soy sauce
generous amount of salt
1 tablespoon of oil

Method

1. Wash chicken with salt and remove all fat.

2. Marinate the chicken with the seasonings and set aside at least for 15 minutes

3. Heat one tablespoon of oil in a Happy Call Pan using medium fire. Fry shallots, garlics and ginger until light brown and fragrant.

4. Push onions etc to the side of the pan and place chicken flat touching the pan. Keep the balance of the sauce for later use. Fry it for about 1 minutes both side or until colour changed and the chicken slightly grilled on both surfaces.

5.  Add in balance of the seasoning sauce, water, liquorice roots, carrots. Let it come to a boil then close the pan and lock it for 15 minutes.

6. Open the pan, stir the ingredients and flip the chicken. Close and lock for another 15 minutes. If it is too dry add a bit of water.

7. Throw in the rock sugar, close and lock the pan for another 5 minutes. Stir well, let it rest for at least 10 minutes and serve hot.

Notes :

1. If you are cooking this as a confinement food, do add generous amount of small onions, ginger slices and liquorice roots into the dish.

Asian Fried Rice

 
A plate of fragrant, grainy and non-oily fried rice is not too hard to cook I supposed, but yet this is a simple dish that will put your Chinese cooking skills up for challenge! Like how my little brother put it, "Taste the fried rice of a Chinese chef and if he/she could cook it right, he/she is good!". He could be generalising his thoughts but to me it makes sense.

I remembered frying a plate of fried rice using leftover rice in the middle of the night for my supper when I was in primary school using simple ingredients like garlics, eggs and black sauce and light soy sauce. Those were the good old days where we had no junk food in the house and if you want to snack, do it or get it yourself! I think the fragrant smell of the black sauce fried with garlics and rice left a profound memory in me as some of my childhood memories somehow flashed back most of the time when I savoured this dish cooked this way.

I am cooking fried rice more often as my kids love it and it is easy to prepare. My version of homecook fried rice uses less oil, less salt and only fresh ingredients... so why not?!

To me, eggs, garlics and light soy sauce are the three key basic ingredients for fried rice and of course not to mention you must have a bowl of non-sticky, non-lumpy but grainy cooked rice. The rest of the ingredients are good or healthy to have.

Cooking rice overnight just to use it for fried rice the next day is not practical for me as i am quite fickle-minded and I always change my menu last minute. If you have a bowl of left over rice then you should consider to fry it the next day.

I used to cook it on the day when I wanted to fry it. What I did is to use the right measurement of water. Gently stir the rice ten minutes after it's cooked and then covered it in the rice cooker for next 15 minutes. Then scoop out the rice, spread it over a flat plate and cool it off completely with fan.

Ingredients

1.5 cup of rice, rinsed and cooked
3 eggs
1 stick big carrots cut into small cubes
1 bowl of green peas
1 cob of fresh corn, remove the corn kernels from the cob
6 cloves of garlic, crashed n chopped coarsely
1/2 cup minced meat (pork/chicken/luncheon meat/coarsely chopped prawn or Chinese sausage etc )
Chicken or Anchovies bouillon granules to taste
Salt and pepper
2 tablespoons light soy sauce
3 tablespoons of oil

Meat marinate
1 teaspoon of soy sauce
1 teaspoon of mushroom/oyster sauce
Dash of sesame oil
Dash of pepper
1/4 teaspoon of cornflour

Method

1. Marinate the meat with the sauce and put one side for 15 minutes.

2. Beat the eggs. Put one tablespoon of oil in the frying pan. Pour in the egg and roughly scramble them after 40 seconds. Scoop and put one side.

3. Put 2 tbsp of oil in the pan. Fry garlic for about 20 seconds and add in carrots. After about a minute add in the marinated meat. Stir fry until meat about to change colour. Add in corn and peas. Fry until corn change colour. Add in light soy sauce and chicken bouillon.

4. Add in cooked and cooled rice and continue to stir gently. Once the rice is well coated with the gravy and mixed well with the rest of ingredients, add in eggs and stir well.

5. Add salt and pepper to taste.


Fried Rice with Luncheon Meat and lots of chopped small onions


Fried Rice with Black Soy Sauce


Fried Rice with Chinese Sausage and Long Beans


Fried Rice with Prawns


Notes:
1. You can used a combination of chopped small shallots and a small portion of garlic.

2. You may add 4 pieces of soaked and chopped finely dried oysters. I bet you if you can acquire the taste of Chinese dried oyster, you will like this version especially when you cook it with Chinese sausage.

3. You may add super finely chopped petai with dried shrimp chillies. For the spicy version, do omit Chinese sausage as the taste doesn't gel.

4. For the eggs, I have cooked the version keeping the ingredients to the basic with no vegetables added but just prawns, eggs and garlic. For this version, stir fry the garlic and prawn until fragrant, add in rice and continue to stir gently. Stir in the beaten eggs to the rice and mix it well so that all grain of rice will be well coated with the yellow golden egg. Otherwise you may just fry the beaten eggs and put aside. Mix when rice is fried with prawn. Frying rice with prawn is really aromatic and nice!

5. For vegetables, you can add edamane / french beans / chopped asparagus/ chopped kailan stalks and other types of crunchy vegetables. Chopped spring onions can be added towards the end.

6. For the meat, you can replace with finely chopped crab sticks, vegetarian shrimp, barbecued pork (char siew), roasted pork etc.

7. It tastes best to just use white rice but for health reason I sometimes will just used the mixture of white, red unpolished and brown rice.


Sunday, July 14, 2013

Steamed Cakes


I have never seen my eldest brother bakes. All along I knew he doesn't mind to spend some time in the kitchen to whip up a meal or two for us. He prefers to handle everything on his own whenever he is in the kitchen. He is a man of few words but a nice guy. I love him for the way he is but I wish if he could open up a little more to me and his siblings so that we could know him better.
 
I was in awe when he asked me how to operate the oven in our mum's place as he wanted to try out some recipes. Without second thoughts I grab the chance to communicate with him my favourite subject. I showed him how to operate the oven, took out some of the baking stuff in the drawers and taught him how to use them. I copied the recipe and explain to him in detailed. I like his spirit of learning and wanted to know-how in areas that interest him though he isn't highly educated.
 
He is experimenting a lot nowadays in chinese pastry which using steaming method.  The pictures are the products of some of his experiments. He made 'Prosperity Cake' or 'Fa Gao' in Chinese and 'Red Tortoise Cake' or 'Ang Gu Kueh' in Hokkien. Both were made with no written recipes, no reference to books, websites or videos but based on his observations of taste and some small talks he had with the cakes seller in the market. It is so amazing and I am very proud of him!! If given guidance and opportunity I am sure he can go far in baking. 
 

Saturday, June 8, 2013

Soy Sauce Chicken


I could still remember the taste of the succulent soy sauce chicken that my confinement lady cooked for me. The ingredients used are so simple and the method is easy. The trick to make a yummy and fragrant soy sauce chicken is to use a very good quality light soy sauce. I grew up in a Chinese village in Kuala Lumpur. Our family never used any store-bought light and dark soy sauces right up to now. We are so blessed that we are able to get the supplies for both sauces fresh from a self-brewed vendor who will come to our place to sell the sauces in a small lorry. So far I could not get a brand of soy sauce that is closed to that standard. Recently I am pleased that I found this brand of light soy sauce that produced by Kwong Cheong Thye which is light, fragrant and not salty.

If you want to serve this food as confinement dish, do double the amount of small onions and add some ginger slices in but still the one that I had for confinement was without ginger. I served this with Koka fat free noodle which has no preservative. Though it was healthy but I didn't quite like the texture of the noodle.


Ingredients
3 drumsticks
Salt to wash chicken
 
1/2 cup soy sauce
1.5 cup water
10 shallots, skin peeled
1 cinnamon stick
1 star of anise
1 tbsp oyster sauce
1 tbsp black sauce
Dash of sesame oil
2 medium sized rock sugar
1 - 2 tablespoons of oil

Method

1. Wash and rub chicken thighs with salt. Remove fat under skin, pat dry and set aside.

2. Wash cinnamon stick and star of anise and set aside.

3. Put 1 tablespoon of oil and add cinnamon stick and star of anise when the oil is heated up.

4. Add in the shallots and stir fry for a minute. Then add in the rest of the ingredients except balance of oil.

5. Cook in slow fire for about half an hour. Switch off fire let the chicken rest in the sauce for at least 15 minutes before serving the dish.

Notes
1. You can use a thermal pot to cook this dish. Simply transfer the chicken with the rest of the ingredients in step 5 to a thermal pot and let it cook in the pot itself for one hour. For this method do reduce the amount of water to 1 cup.

2. You may replace the cinnamon stick and star of anise with a few sticks of liquorice root and a handful of tiny red rose buds for another new recipe. I tried this before and it tasted yummy and fragrant with mild rose aroma.

3. If you want a stronger herbal flavour and twist this further for a real confinement food, you may omit the shallots, cinnamon sticks, star of anise and all the sauces but add in Dong Kwai (Angelica sinensis), red dates, Goji (wolfberries) and condiment like chicken essence or Huiji Waist Tonic.

4. This dish goes well with rice or noodle and it is all up to you!

Wednesday, June 5, 2013

Indian Curry Chicken


This is my family's favourite curry chicken. I longed to eat it as i have not been cooking this for a long time. I used to cook this dish preparing all ingredients from scratch. The original recipe was taken from an Indian cookbook called 'Taste of India'. Suggested by the name, you should able to guess that all recipes found in the book are authentic Indian cuisine. Freshness of ingredients and uses of variety of Indian spices are not compromised. However, as much as I prefer and like the authenticity of Indian cuisine or any other cuisines, I don't think I have more energy to prepare this after a hard day of child caring.

This recipe that I came out with has almost all the essential ingredients needed to cook up an authentic Indian curry chicken. The trick is to use the ready-mixed wet curry paste that I could get in any local supermarkets in Singapore. The brand that I used is Hai's Chicken Curry Paste. It came with two types of paste; chilli paste and wet curry paste.  As they separate the chilli and curry paste, you could adjust how spicy you want your curry to be. I used one packet of chilli paste and two packets of wet curry paste. The wet curry paste has all ingredients that I needed like galangal, lemon grass, garlic, turmeric, candlenuts, salt and spices.


If you could not get this brand of wet paste curry that I used you could still make the paste yourself. Blend together one thumb-sized galangal, two thumb-sized turmeric, 5 candlenuts, 3 stalks of lemongrass, 5 fresh chillies (de-seed) and 10 dried chillies (soak and de-seed). 


Ingredients

1 bird 700g Chicken, chopped into big pieces 
6 medium-sized potatoes, peeled
2 packets of Hai's curry chicken paste (Use 1 packet of chilli paste and 2 packets of wet curry paste)
4 ripe tomatoes
3 cups of water

2 cinnamon sticks (about 3 - 4 inches)
8 cardamons
2 star of anise
10 cloves
6 stalks of curry leaves, stem removed
5 big onions, coarsely chopped
1.5 bulbs garlic, coarsely chopped
2inches of thumb sized ginger, sliced
4  - 6 tbsp of Baba's meat curry powder
3 - 6 tbsp cooking oil

Method

1. Remove fat from chicken, wash clean and marinate with two tablespoon of curry powder. Set aside for 15 minutes.

2. Meanwhile wash all the dried spices like cinnamon sticks, cardamons, star of anise, cloves, curry leaves and set aside.

3. Chop tomatoes and potatoes into wedges. Steam potatoes for 15 minutes and set aside.

4. Heat up 2 tbsp of oil and shallow fry all the dried spices for about a minute or until the cinnamon sticks opened up. Then put in the curry leave and fry for another 30 seconds.

5. Throw in ginger and fry for another 30 seconds then put in the chopped onions and garlic to stir fry for another 1 - 2 minutes or until fragrant but not burnt.

6. Add chilli and wet curry paste and cook for another 1 minute then add 2 tablespoons of curry powder and cook for another 30 seconds. Do add oil at this step if the paste stick to the pot.

7. Put in the chicken and continue to stir until chicken pieces are coated with the cooked spices and paste.

8. Slowly add in 2 cups of water when the chicken pieces started to change colour. At this point you could adjust the amount of water you want to add. If you prefer wet curry with thin gravy you may add up to 3 cups and reduce it to about 1.5 to 1 cup if you want it thick and dry.

9. Add in the potatoes and cook together with chicken for next 20 minutes with lid covered.

10. Add tomatoes in and continue to cook for 10 minutes. Add salt and a little sugar, switch of fire and cover for at least 20 minutes before you  serve the dish.

Notes:

1. Do look out and try other brands of instant wet curry paste that may have the essentials ingredients for curry chicken. I don't believe that there isn't substitute to the one that I am currently using.

2. You can twist this recipe easily if you want to cook Chinese curry chicken. Just omit dried spices and tomatoes. Add in more lemon grass and coconut milk.

3. If you want to have dried Indian curry chicken, simply add less water and cook with lid open. Vice verse if you enjoy curry with plenty of gravy yet thick do not sting on the curry paste and add in a little more water. Do take note that tomatoes will draw out its juices at the end so do not add in too much water otherwise the curry will turn watery and the flavour will be diluted.

4. I like this recipe as I do not have to grind any spices or ingredients but just simply wash and chop. Furthermore, it didn't call for coconut milk so you could really cook this in advance and keep them frozen for a week in the fridge.
Related Posts Widget for Blogs by LinkWithin