Wednesday, June 5, 2013

Indian Curry Chicken


This is my family's favourite curry chicken. I longed to eat it as i have not been cooking this for a long time. I used to cook this dish preparing all ingredients from scratch. The original recipe was taken from an Indian cookbook called 'Taste of India'. Suggested by the name, you should able to guess that all recipes found in the book are authentic Indian cuisine. Freshness of ingredients and uses of variety of Indian spices are not compromised. However, as much as I prefer and like the authenticity of Indian cuisine or any other cuisines, I don't think I have more energy to prepare this after a hard day of child caring.

This recipe that I came out with has almost all the essential ingredients needed to cook up an authentic Indian curry chicken. The trick is to use the ready-mixed wet curry paste that I could get in any local supermarkets in Singapore. The brand that I used is Hai's Chicken Curry Paste. It came with two types of paste; chilli paste and wet curry paste.  As they separate the chilli and curry paste, you could adjust how spicy you want your curry to be. I used one packet of chilli paste and two packets of wet curry paste. The wet curry paste has all ingredients that I needed like galangal, lemon grass, garlic, turmeric, candlenuts, salt and spices.


If you could not get this brand of wet paste curry that I used you could still make the paste yourself. Blend together one thumb-sized galangal, two thumb-sized turmeric, 5 candlenuts, 3 stalks of lemongrass, 5 fresh chillies (de-seed) and 10 dried chillies (soak and de-seed). 


Ingredients

1 bird 700g Chicken, chopped into big pieces 
6 medium-sized potatoes, peeled
2 packets of Hai's curry chicken paste (Use 1 packet of chilli paste and 2 packets of wet curry paste)
4 ripe tomatoes
3 cups of water

2 cinnamon sticks (about 3 - 4 inches)
8 cardamons
2 star of anise
10 cloves
6 stalks of curry leaves, stem removed
5 big onions, coarsely chopped
1.5 bulbs garlic, coarsely chopped
2inches of thumb sized ginger, sliced
4  - 6 tbsp of Baba's meat curry powder
3 - 6 tbsp cooking oil

Method

1. Remove fat from chicken, wash clean and marinate with two tablespoon of curry powder. Set aside for 15 minutes.

2. Meanwhile wash all the dried spices like cinnamon sticks, cardamons, star of anise, cloves, curry leaves and set aside.

3. Chop tomatoes and potatoes into wedges. Steam potatoes for 15 minutes and set aside.

4. Heat up 2 tbsp of oil and shallow fry all the dried spices for about a minute or until the cinnamon sticks opened up. Then put in the curry leave and fry for another 30 seconds.

5. Throw in ginger and fry for another 30 seconds then put in the chopped onions and garlic to stir fry for another 1 - 2 minutes or until fragrant but not burnt.

6. Add chilli and wet curry paste and cook for another 1 minute then add 2 tablespoons of curry powder and cook for another 30 seconds. Do add oil at this step if the paste stick to the pot.

7. Put in the chicken and continue to stir until chicken pieces are coated with the cooked spices and paste.

8. Slowly add in 2 cups of water when the chicken pieces started to change colour. At this point you could adjust the amount of water you want to add. If you prefer wet curry with thin gravy you may add up to 3 cups and reduce it to about 1.5 to 1 cup if you want it thick and dry.

9. Add in the potatoes and cook together with chicken for next 20 minutes with lid covered.

10. Add tomatoes in and continue to cook for 10 minutes. Add salt and a little sugar, switch of fire and cover for at least 20 minutes before you  serve the dish.

Notes:

1. Do look out and try other brands of instant wet curry paste that may have the essentials ingredients for curry chicken. I don't believe that there isn't substitute to the one that I am currently using.

2. You can twist this recipe easily if you want to cook Chinese curry chicken. Just omit dried spices and tomatoes. Add in more lemon grass and coconut milk.

3. If you want to have dried Indian curry chicken, simply add less water and cook with lid open. Vice verse if you enjoy curry with plenty of gravy yet thick do not sting on the curry paste and add in a little more water. Do take note that tomatoes will draw out its juices at the end so do not add in too much water otherwise the curry will turn watery and the flavour will be diluted.

4. I like this recipe as I do not have to grind any spices or ingredients but just simply wash and chop. Furthermore, it didn't call for coconut milk so you could really cook this in advance and keep them frozen for a week in the fridge.

Sunday, May 12, 2013

Steamed Red Snapper with 3 Sauces

Today we had a simple 3-dish meal with miso soup for dinner. We had fried vegetable with pork shabu shabu, fried prawn tempura and steamed red snapper with three sauces. 

The key ingredient for the sauce mixture is this special Taiwanese sauce called bull head toona bean paste that i bought a while ago during the Taiwan fair held in my neighbourhood supermarket.

This sauce goes well with rice noodles and thick 'mee suah'. You can find more details about the sauce and other taiwanese sauces in this website http://www.hawdii.com.tw

Ingredients :
 
200g -  300g red snapper fillet
2 tsp of chinese cooking oil
One thumb size ginger - half sliced for steaming with the fish and another half shredded for frying with garlic
6 cloves of garlic -chopped
Spring Onions - chopped

Sauce
1 tbsp of bull head toona bean paste 
1 tsp of fermented bean paste sauce
1 tsp of hoisin sauce
2-4 tbsp of water
Sesame oil
Sugar 

Method :

1. Fry shredded ginger and minced garlic and set aside.

2. Chop spring onions and set aside

3. Wash red snapper and put sliced ginger on top and steam with 2 tsp of wine for about 10 minutes in slow fire. Set aside the juice from the steamed fish and mix this with the sauce later.

4. Put a little oil in the medium heated wok and pour all the sauces into the pan and cook for a while until fragrant. Add about 2-4tbsp of water and the fish juice that we had set aside. Add sugar to taste. Add a dash of sesame oil and switch off fire.

5. Pour the sauce mixture on top of the steamed fish.

6. Garnish with fried garlic, ginger and chopped spring onions.

Note :
1. I think this dish will taste better if we were to cook the sauce with one piece of crushed sour plum and some chopped chilli paddy.

2. The bull head toona bean paste is a little oily itself. 

Friday, April 26, 2013

Minced Mutton in Mild Sauce


Have you ever experienced a day that you thought you have planned what you wanted to cook for lunch and got all the ingredients ready but changed your mind totally when you saw some other interesting ingredients you have in the fridge or pantry? I had that crazy day yesterday. I planned to cook pasta with fish and chick peas but I was inspired to cook something else when I saw a packet of minced mutton in the freezer. I guess it is that impromptu curiosity, excitement and inspiration to tweak, to experiment and of course to eat and taste that spur me to cook different stuff and continue cooking....

Something spicy would be nice for minced mutton I thought, but on second thought the lunch I was going to prepare was more to fill the hungry stomachs of my kids upon their return home from school. I decided to cook something mild yet flavourful and delicious minced mutton for them.

If you could not accept the strong flavour of the cumin and turmeric, you may reduce the amount and increase the tomato paste. I was taking a chance to cook this and true enough my boy was reluctant to open his mouth to eat it when he first smelled the dish. He said it was curry dish and that it would be spicy. Fortunately, I was able to convince him to try and that the dish wasn't spicy at all. He took the first spoon and he liked it with white rice!!  My daughter and I had it with tomato bread with herbs. My girl is a mild curry lover and she told me this today, "Mum I liked my lunch yesterday"... I was beaming in return.


Minced Mutton in Mild Sauce
250g mutton
1 big onions coarsely chopped
5 cloves of garlic coarsely chopped
4 medium size potatoes, cut into cubes
4 sticks of carrots, cut into small cubes
1 big bowl of peas
1 bay leaf
5 tablespoon of tomato paste
3/4 tsp of turmeric powder
1 tsp of cumin powder
500ml beef stock

Method

1. Heat up a non-stick pan with one tablespoonful of cooking oil in slow fire. Fry onions and garlic until slight soft. Add bay leaf, carrots and potatoes. Continue to stir fry for about a minute.

2. Add in the mutton, tomato paste, turmeric powder and cumin powder. Continue to stir and let it simmer in slow fire for a minute.

3. Transfer it into a pot, add in beef stock. With lid covered, let it simmer in slow fire for about 25 minutes.

4. Add  in peas and continue to let it simmer with lid opened for 5 minutes.

Notes :
1. I was thinking perhaps adding cinnamon stick, cardamon seeds, star of anise, clove, cut tomatoes and garam masala would be a good blend for a more pungent mutton curry flavour.

2. I didn't add salt to this dish in view of the sodium level in the the store-bought beef stock but a little dash of the mineral was able to bring out the taste of the dish.

3. You may add natural yogurt to thicken the sauce. I was thinking whether the same recipe with a tweak towards western flavours would be suitable to use as filling for shepherd's pie?

Sunday, April 21, 2013

Strawberries Cream Cheese Butter Cake


I was having a little body ache after a bowling game with my family yesterday. If I could I would really wish to spend some time doing nothing but just relax after our Sunday Mass at the church. However, my mind just could not detach from this gorgeous picture that I saw in a blog on a cream cheese butter cake. I visited Cuisine Paradise frequently to look out for healthy, yummy and inspirational recipes. It is an awesome blog and I could almost feel the writer's energy, passion and sincerity sharing all what she knows and likes about food each time I read her post!

I find that it is exciting to bake unplanned every time. So even though my muscles are a little stiff I went ahead to do a simple baking project with the kids. I enjoyed it so much doing this with my kids though baking with younger kids means you have more clean up to do and it was time consuming as you have to be really patient explaining and giving instructions to them. But those are the points; you want them to learn through fun; it was the best way and environment for them to be exposed about home economics and to learn this important life skill. I have learned to be patient with the kids and to 'tolerate' the mess if I want to engage them with kitchen activities. It defeats the purpose of learning if you did most of the steps for them for fear of mess. It definitely kills their excitement and fun; and worst their self esteem.

This recipe is adopted from Cuisine Paradise. The changes that I made to the recipe are as follows:

a) I used strawberries instead of the blueberries as I found none in my local supermarket.

b) I used two 4" x 9"x 3" baking tin and maintain the baking time.

c) I divided the recipe into two portions for all the ingredients as I wanted the kids to get better hands-on and feel confident that they are in control.

The cake is so easy to make, delicious and gorgeous!!


Notes :

1. The cake is really soft so do take note when removing it from the tin. Revert the cake only when it is completely cool.

Friday, May 25, 2012

Cream Custard

The cream custard was made as filling for the cream puff I made. The recipe was also based on 'Ah Jiao Excellent Chef' programme. This recipe is simple and the custard cream texture is very smooth and best to be consumed when it is very cold. The recipe is perfect however I find the rum used was just too strong for me since I prefer more vanilla flavoured desserts than anything else with too much alcohols.

CREAM CUSTARD
Ingredients
415g milk
100g castor sugar
5 egg yolks
25g unsalted butter
25g cake flour
25g cornflour
1/4tsp vanilla extract
1tsp rum/brandy

Method
1. Divide the milk equally into 2 bowls.

2. Stir cake flour and cornflour in one bowl of milk and mix well.

3. Beat all the egg yolks in another separate bowl and then mix the wet flour mixture in.

4. Add sugar to another bowl of milk and stir then pour this mixture into a clean saucepan and let it boil.

5. Pour the boiled milk to the flour mixture in step 3. Stir continuously as you pour so that you won't get scrambled egg.

6. Strain it to get the smoothest mixture and then put this back to the stove to boil.

7. Cook it until the mixture become thick and this will happen very fast. Continue to stir. When it started to thicken remove from the stove. Add butter and continue to stir. Butter will melt by the residual heat and the mixture will continue to thicken. Continue to stir and add in all the extracts.

8. Transfer quickly to another bowl to let it cool off and to stop it from thickening.

9. Cover it with a piece of clingwrap and press the wrap onto the surface of the custard to avoid a skin from forming.

10. Once cool completely, chill it in the refrigerator.


Saturday, May 19, 2012

Cream Puff


A reader has written in to request for the recipe of cream puff from Ah Jiao's Excellent Chef programme. I am a fan of the programme and so far I have tried a few recipes and each recipe is a proven success and so far they have never let me down. I had coincidently baked some cream puffs for my kids' birthday party and therefore able to share here.

I baked in 2 batches and each was a success. It is very much depend on your liking as to what kind of texture you prefer. Some prefers crunchy crispy top while others prefer soft puffs. If you prefer the former ones then fill the filling right before serving and it is in my opinion that the puffs best to be baked near to serving time to maintain its crispiness for this purpose. Also in order to achieve this, you may want to slit open or poke a hole at the bottom of the puff as this will help the hot steam escape after the first 20 - 30 minutes bake. This was what I did. Being inexperienced as this was my very first attempt and that I had read from other baking sites about cream puff baking, I also scraped out the damp dough inside the puffs at this point and popped them back into the switch-off mode oven with the door left ajar for another 10 to 20 minutes. All these were done to maintain its crispiness. However, as this is not a crisp crust puff recipe so no matter what, the puff will turn soft eventually and even softer if you were to fill them up with your favourite filling and keep them in the refrigerator for a few hours.

I personally feel that the steps of slitting the puffs and scraping the damp dough are not necessary if you like the soft puff type; like those that we usually get from most of the local bakery stalls. In fact, I discovered that many of my friends prefer soft puffs than the crispy ones. As for myself I like both textures. I like the crispiness and crunchiness of the freshly baked puffs which are filled with very chilled cream and also those soft ones that almost melt in your mouth! It was a regret though that I was not in time to get the recipe and the ingredients to make a durian cream filling, otherwise to me this recipe was super excellent!


CREAM PUFF

Ingredients

85g water
50g unsalted butter
60g bread flour
125g whole egg

Method

1.  Pour water and butter into a saucepan and let it boil until butter is melted.

2. Pour in the flour and cook it. Remove the pan from the stove. Stir and cook using residual heat.

3. Transfer the mixture to a bowl to bring down the temperature. Continue to stir until the mixture thicken.

4. Add eggs slowly in 3 batches and continue to stir with a spatula until the ingredients come together.

5. Scoop the mixture in a piping bag and pipe on the baking sheet about 3cm diameter for each puff.

6. Spray water on the puff.

7. Bake for 30 minutes in a preheated oven at 200deg C. Switch off the oven slit open the puff or/and scrape the damp dough and pop the puffs into the oven with door left ajar for another 10 -20 minutes.

Notes:

1.If the mixture is too thick, you may add a little more egg but not otherwise as you can't do anything if the consistency is too thin.

2. The right texture is when the batter coated on the spatula, and  that you are able to see bits of the dough hanging from it like a triangle flag.

3. You may use spoon to scoop if you do not have piping bags.

4. Spraying of water on the dough will help the dough to crack more and evenly.

5. The flour must be cooked with the water and butter otherwise the puff won't puff!

6. Always do an upwards piping so that the puff will rise and not outwards piping.


Friday, May 18, 2012

Kid's Birthday Party.... My Kids!!

I decided to have a combined birthday celebration for my daughter and son last year since their birthdays are just less than 3 weeks apart. The daddy worked on the games, gifts and decorations while I took care on the guests list and the food. I decided not to cater for the food by reducing the size of the guests. We kept the party small but fun-filled at least for the kids, after all it was their party! I love to set a stretched goal for myself to know and test my abilities. Perhaps this was due to what I used to do previously as a quality executive; breathing and preaching about stretching the target in a set mission statement!! I had challenged myself to cook for about 20 adults and 10 kids. Credits must be given to hubby, parents-in-law and friends who chipped in to help out in one way or another. Great thankfulness I must expressed to them and to God for making this warm celebration a memorable one!! The kids had so much fun. My daughters' friends still talking about the party till today!

The food that I planned and cooked were as followed:
1. 'Peranakan Curry Assam Fish'
2. Fried Pumpkin with Salted Eggs
3. Baked Carrots and Potatoes with Cheese
4. Creamy Mushroom Soup
5. Baked Chicken with Garlic
6. Fried Chicken Wings - Cooked by my GodMother
7. 'Peranakan Mee Siam' - Cooked by my Mother-In-Law
8. Cream Puffs
9. Fruits and Drinks

I am proud of myself for being able to cook these. I am not here to boast about my abilities; for I know and thank God that all strengths come from HIM; but I think it is important for me to be aware of my strengths, capabilities and interests.

Here are some photos of the foods and the special moments we had and shared together.

Cream puffs straight from the oven waiting to be cooled off then filled with chilled custard cream.

Peranakan Curry Assam Fish
 Baked Carrots and Potatoes with Cheese
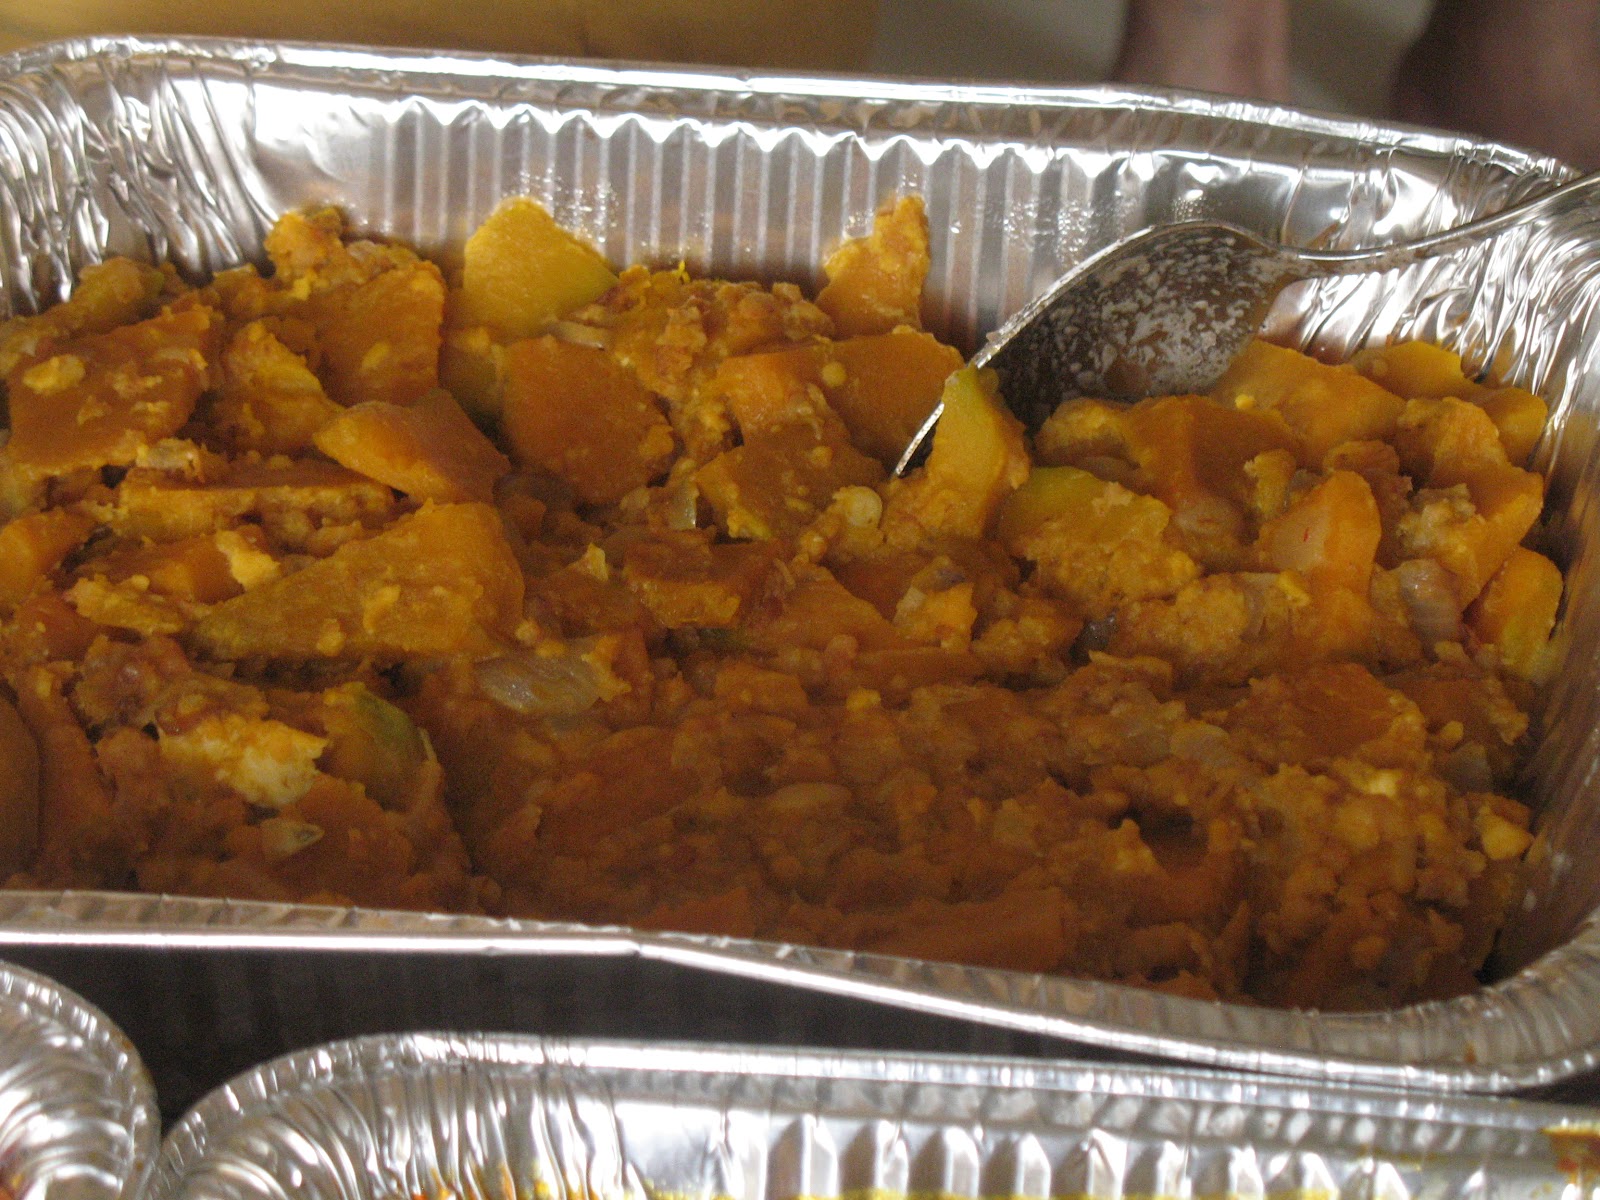
 Fried Pumpkin with Salted Eggs
This was the most hit dish by the adults. It is one of the popular 'Peranakan' dishes and it is truly authentic!!


Creamy Mushroom Soup
Hubby dressed up as a clown to kick start games session!
Musical chairs..
The lovely chocolate cake we ordered from one of the local bakery shop called Four Leave.

My lovely and beautiful children!! Thank God every moment for their presence in our life.
 Cutting the cake with the grandfather..
Not our practice to let the kids to open the gifts before the guests leave but this was exceptional since it was from Grandma..
My girl with her two closed friends at school, showing off their talents in dancing the Indian dance steps they learned from the teachers.
Related Posts Widget for Blogs by LinkWithin